How is a Scalp Biopsy Performed?

There are over 100 reasons for an individual to have hair loss. Sometimes the reason for a patient's hair loss is evident within seconds of meeting the patient. At other times, the diagnosis requires a small scalp biopsy. A scalp biopsy is a short procedure, performed under local anesthesia, that allows a few hairs (and the skin surrounding those hairs) to be removed for future examination under the microscope.
I routinely teach medical students, residents and fellows how to do proper scalp biopsies so that a good sample can be obtained. It is absolutely essential to get a good sample - one that is deep enough, big enough and not damaged. Here, I outline the proper technique for obtaining a biopsy. I often use an orange to demonstrate the procedure rather than showing the scalp. The orange background allows the key learning points to be very easily seen. Here, I'll use the orange as well to demonstrate the basic technique.
12 Steps to Performing a Scalp Biopsy

An orange is used to demonstrate the proper technique of performing a scalp biopsySTEP 1: Spend time finding an area of the scalp that best respesents the hair loss condition you think the patient has.
If the patient has an unusual pattern of hair loss, or I think that only some areas of the scalp are affected by the condition, I spend many minutes searching for the "perfect spot" to biopsy. If I think the patient has a scarring alopecia such as lichen planopilaris, I look for an area with perifollicular erythema or scale. If I think the patient may have an unusual or atypical form of alopecia areata, I look for empty tracts or vellus like hairs.

STEP 2: Draw a circle around the area.
A blue Acculine Marking Pen can be used to outline the area. I like these pens because the marker does not wash off easily. Therefore, the circle will stay until it is wiped away at the end of the procedure.

STEP 3: Cut the hairs that are to be taken in the biopsy.
I routinely cut the hairs that I am going to sample. I clip the hairs to a distance of about 2-3 mm above the scalp. This way I can accurately see the angle that the hairs emerge from the scalp. This will be important in Step 6 (below).

STEP 4: Clean the skin.
The skin can be cleaned with many of the commercially available cleansing solutions. I typically use chlorhexidine.
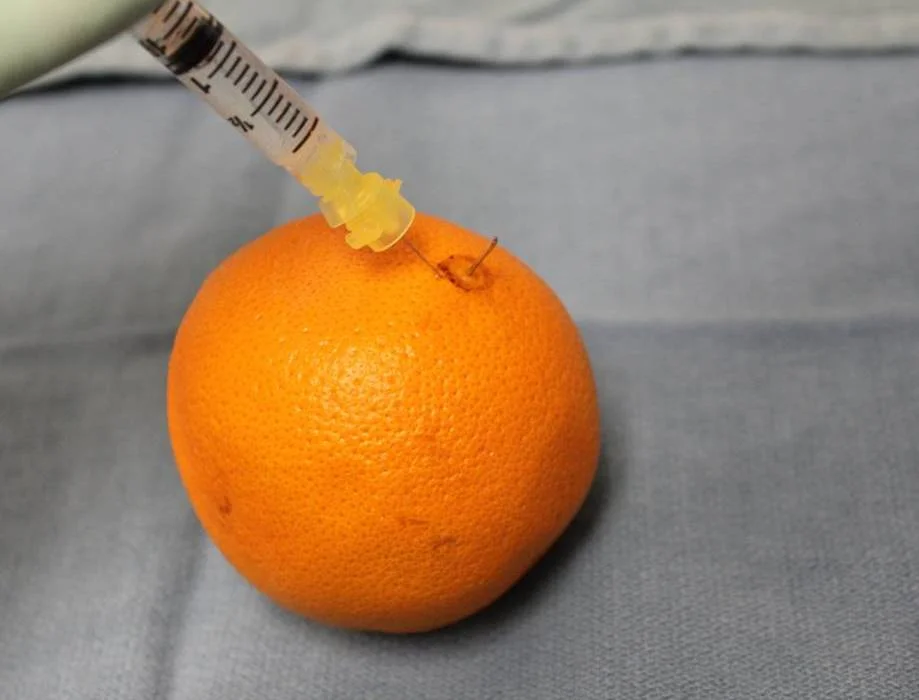
STEP 5: Anesthetize the skin
The skin surrounding the hairs is frozen with a numbing solution such as 1% lidocaine with 1:200,000 epinephrine. After freezing the skin, I typically wait 10-15 minutes if possible. This allows the epinephrine to take full effect and drastically helps to reduce bleeding during the small procedure.
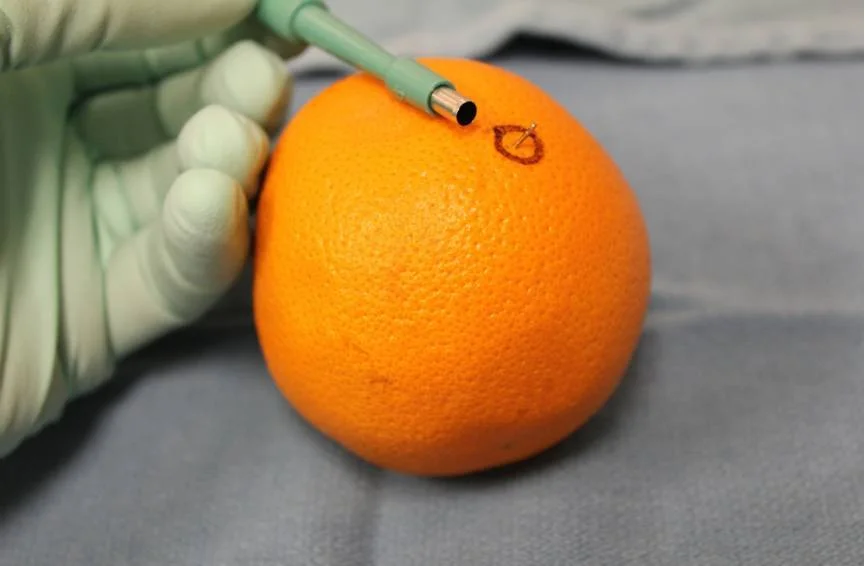
STEP 6: Use a 4 mm sized punch biopsy tool to puncture the skin.
The minimum size for a punch biopsy for scalp specimens is 4 mm. These recommendations follow those of the North American Hair Research Society.

The biopsy tool is placed directly over top of the hair - at the precise angle that the hairs are coming out of the scalp. The biopsy tool is then rotated back and forth quickly until the metal blade is completely submerged to the level of the subcutaneous fat. Then the biopsy tool is removed.

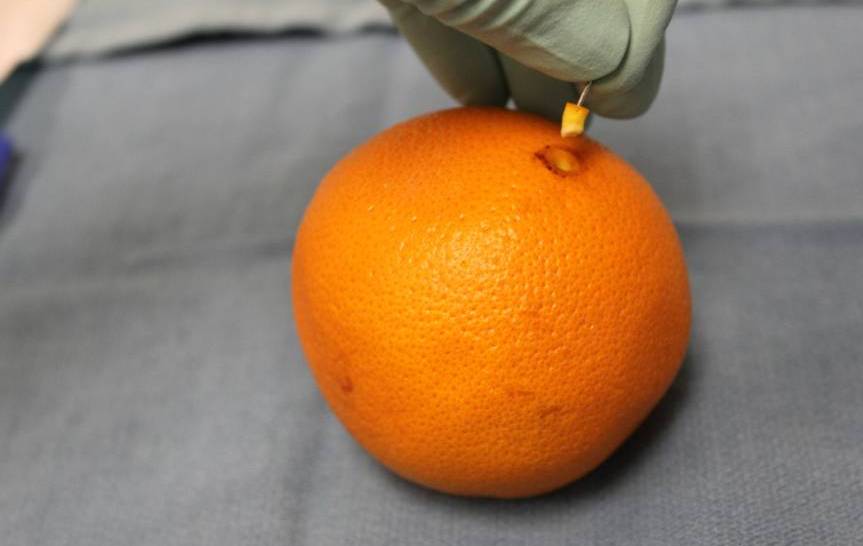
STEP 7: Delicately pull up on the specimen using the anesthetic needle.
Once the biopsy site has been made, it's important to treat the biopsy specimen very delicately. I use a 30 G needle (the same one used to freeze the skin) to "pull up" on the specimen.

STEP 8: Cut the biopsy specimen at the base.
Once the biopsy specimen has been pulled up, I cut it at the base in a horizontal manner using scissors. It is very important that this be done at the subcutaneous junction.
STEP 9: Remove the specimen.
After the specimen has been cut at the base, it can be easily removed from the scalp. It can be placed directly into 10% buffered formalin for transport to the histology lab.
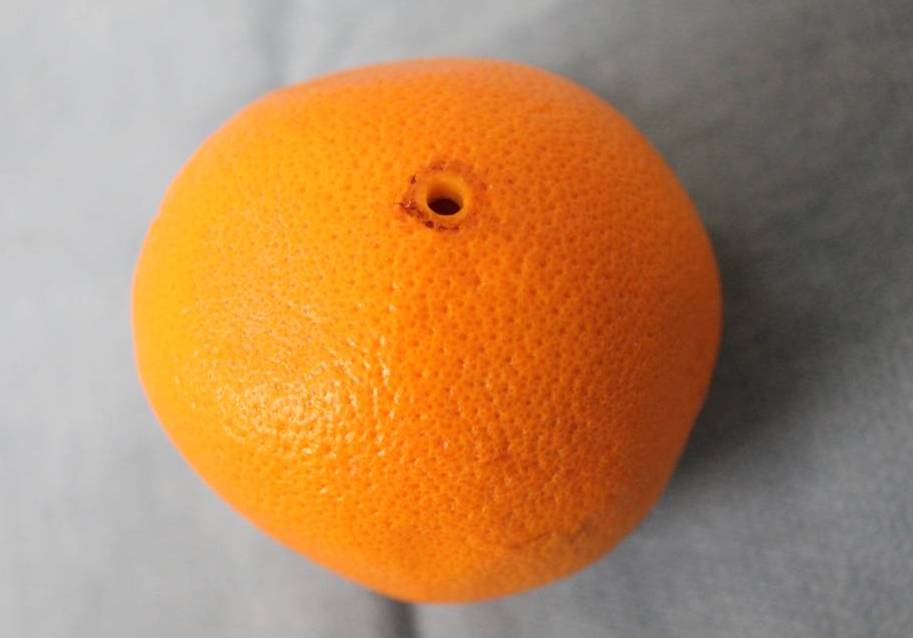
STEP 10: Suture the small opening.
The small opening can be closed with 3-0 or 4-0 nylon. Some physicians choose to leave it open without a suture or pack it with kaltostat.

STEP 11: Place petroleum jelly over the suture site to promote moist wound healing.
The biopsy site can be left uncovered. A bandage or dressing is not needed. A small amount of petroleum jelly can be placed over the incision site to keep it moist. Some physicians choose to use antibiotic ointment after the procedure and this is acceptable too. I typically advise patients to wash the area after 24 hours and to continue to apply petroleum jelly for an additional 5 days. It is well accepted that moist wounds heal better.
STEP 12: Remove the stitches in 10-14 days.
The small stitch is cut with scissors after 10-14 days.
All in all, performing a scalp biopsy is easy, and can be performed with little discomfort to the patient. The following represents a basic set up of a surgical tray:

1. chlorhexidine solution 2. punch biopsy tool 3. needle driver 4. pick ups 5. scissors 6. q tips for applying petroleum jelly 7. suture 8. sterile drape 9. gauze
This article was written by Dr. Jeff Donovan, a Canadian and US board certified dermatologist specializing exclusively in hair loss.